In this tutorial, we’re going to look at how to speed up Synology NAS.
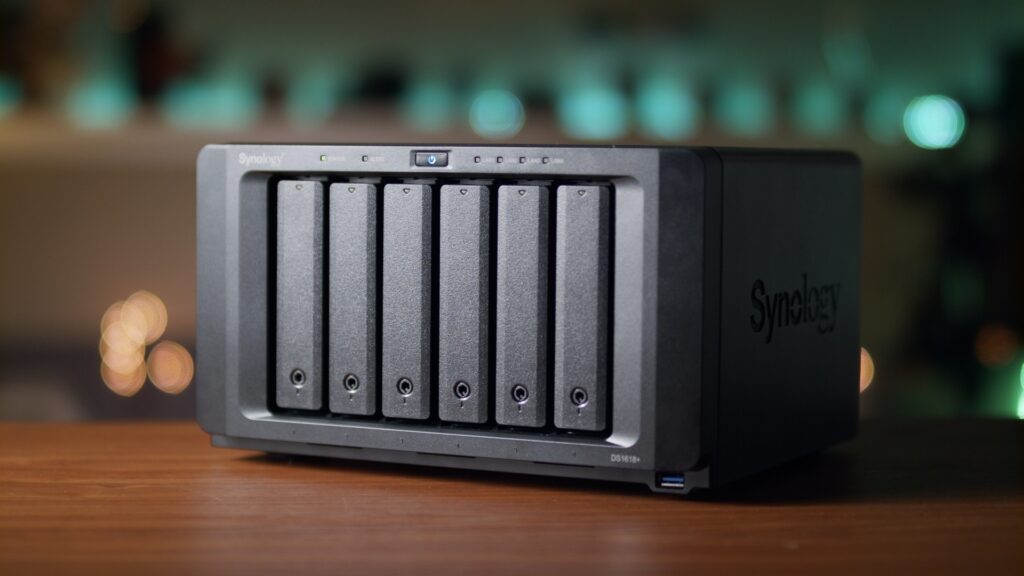
Those who are familiar with NAS products must be familiar with the brand Synology, which has always been the leading brand in NAS industry. It is known for its system optimization and user-friendly experience. In fact, at the hardware level, Synology NAS also has a lot of humanized design. For example, Synology’s main performance models have dual M.2 ssd cache interfaces and multiple network ports, but not many people know about this design and how to use it. Therefore, this article will talk about how to use SSD cache and link aggregation function to speed up Synology NAS.
About NAS selection – Why choose Synology NAS?
NAS (Network Attached Storage), which is simply a private 7*24 hours online storage server that can provide low-power and all-day network storage service for individuals and companies. With the advent of information technology and the 5G era, data capacity has exploded and content sharing has become mainstream. And NAS 24/7 private storage services are becoming more and more important.
A NAS is actually a miniature computer, so network storage as well as data sharing applications must be built on the system to make it possible. The hardware difference between different NAS is not that big, you can even achieve cost-effective deployment by DIY hardware. The software system is the core competitiveness of NAS products, and the excellent system is the biggest credit for Synology to be the first brand in the industry. If the iOS system is responsible for the high price premium of Apple’s iphone, the price premium of Synology is entirely due to its well-equipped system and APP ecosystem.
Among many NAS systems, Synology NAS system is undoubtedly standing at the top of the pyramid. In terms of system user-friendliness, Synology is the best optimized one. Overall, the Synology NAS system is relatively easy to set up. Most of the setup options of Synology NAS are easy to understand at a glance, and the interface is very refreshing.
Although a lot of NAS systems are redeveloped based on Linux kernel, Synology has put a lot of effort in the interface, settings, deployment and other humanized design. The Synology NAS system interface adopts a simple and easy-to-use minimalist style, which avoids complicated settings and greatly reduces the difficulty for users to use. And the functions of the whole setup page are clear at a glance, that is really friendly to users who are new to NAS.
What can Synology NAS achieve?
With rich suites and a complete APP ecosystem, Synology NAS can also help you achieve many other functions besides regular file storage and sharing, such as remote office, private cloud drive, photo smart management, streaming media server, etc. Synology NAS is much more powerful than you think.
1. Telecommuting – Synology Drive
The telecommuting function is a unique secret of Synology, especially in the first half year of the epidemic, I believe many of you have already felt the inconvenience of telecommuting, such as:
- Company files are stored in the office computer, so you can’t get the files from your home office.
- How should I transfer large files such as image files, pictures and videos to my colleagues? If I can only transfer via Telegram or E-mail, it is inconvenient and takes up space on my phone and computer.
- When multiple people edit documents, tables, slides together, it is easy to create versioning problems because the documents are transferred back and forth between different people.
- Interactive discussion, revision, and approval need a more efficient way.
Synology Drive is designed to solve the above problems.
Drive Clinet can automatically synchronize files between multiple devices, enabling seamless multi-device integration in various scenarios in the office, travel, and home. This is also the feature I use most often, especially in the case of temporary office travel, where I can access all my work information at any time.
In addition, Synology Drive allows you to create, edit and modify documents in the cloud, and Synology Drive fully supports Office format. By setting up different permissions, we can easily realize multi-person collaborative cloud office. With just one browser you can edit documents, forms, PPTs, etc. in the cloud with your team. Traces such as inserting annotations and modifications will be visible at a glance. For the history version record, any team member’s modification or mistaken deletion can retrieve the history version with one click. Synology drive can really provide you multiple protection.
2. Private Cloud Drive
NAS storage applications are not limited to LAN file storage. With Synology’s Quick Connect service, you can access your files remotely, regardless of whether you have a public IP or not, you can view and use your files anytime, anywhere. Compared to the other cloud services and other network drives, not only it is privacy and more secure, but also you don’t have to worry about the transfer speed limits.
3. Photo Management
Photo management is one of the biggest selling points for Synology NAS, and I believe many of you bought Synology NAS because of its powerful photo management function. With the addition of 6.0 system Moments, Synology’s photo management is on the next level. Synology supports face recognition, scene recognition, AI and other intelligent recognition, with timeline and photo wall your use experience will go to the next level.
On this basis, we’ll cover Link Aggregation and SSD Cache and how to use the SSD cache and link aggregation function to speed up Synology NAS.
Synology NAS Model Introduction – Synology DS720+
As a loyal Synology NAS user, I purchased the Synology DS720+ at the first launch of the 20 series.
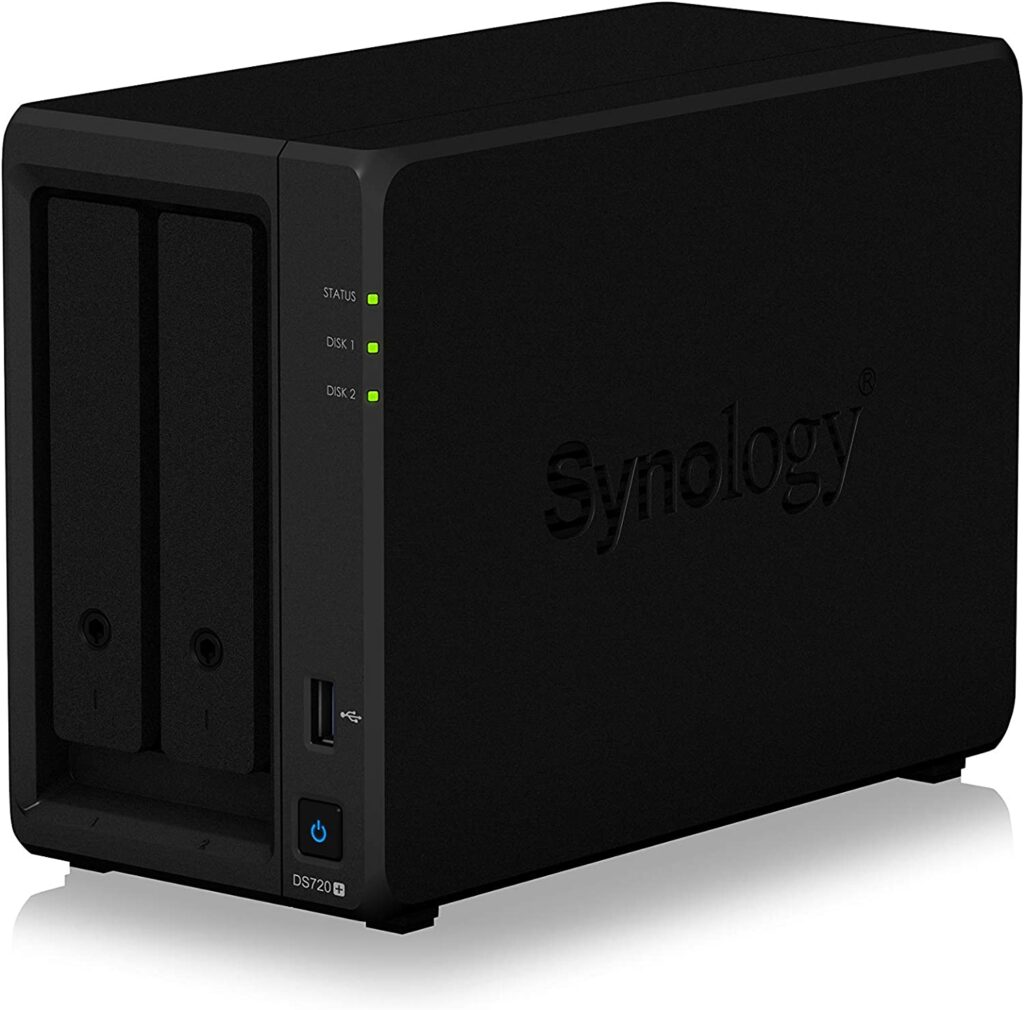
The Synology DS720+ is a model that sells itself as a high performance model. Although it only has two disk bays, it can reach up to 7 disk bays through expansion cabinets. In addition, the dual m.2 ssd interfaces and dual network port design, which can realize the ssd high cache and link aggregation function, maximize the performance advantage.
DS720+ still continues the family style of Synology. There is no big change in the appearance, it still has the same hard lines and simple design, but no loss of aesthetics. The Synology logo is still hollowed out on the side of the DS720+, and this design also serves as part of the cooling function, which is also the consistent design style of the Synology family.
The back of the chassis is equipped with dual Gigabit LAN ports, eSATA ports, USB 3.0 ports, and a power connector in addition to a large cooling fan. The dual Gigabit LAN ports are needed for link aggregation.
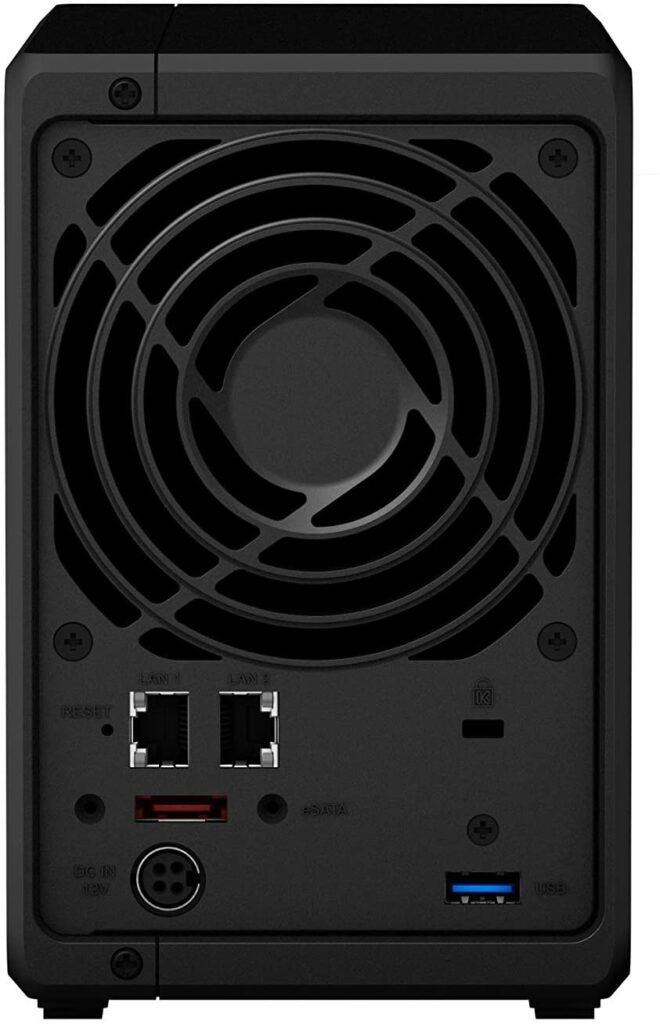
As the main performance model, the Synology DS720+ naturally needs a cache SSD interface. Two M.2 SSD slots are designed at the bottom of the chassis, with the new SNV3400 SSD cache built by Synology, it can improve I/O response efficiency by 20 times without taking up hard disk space.
How To Speed Up Synology NAS – Link Aggregation Setting
If you are an old NAS user, you must have encountered the problem of transfer speed limit. Usually the transfer speed is stuck at the 100MB/s limit. This is mainly due to two reasons, one is that the mechanical hard disk read and write speed is often about 100MB/s. But we can break through the hard drive read/write speed limit by forming a raid, using an ssd drive or SSD cache as described below.
The second reason is the limit of the gigabit wired network. Our current mainstream single-port wired network can only provide gigabit transmission speed, so if you want to break through the network gigabit limit, you can choose to upgrade the basic network environment of 2.5G, 10G, or use the multi-port link aggregation we mentioned in this article to achieve speed boost.
Link Aggregation
Link Aggregation is the aggregation of multiple physical ports together to form a logical port to achieve load sharing of outgoing/incoming traffic throughput across member ports. A simple understanding is to overlay network speed, N network cable docking, speed * N. The advantage of using link aggregation to increase network speed is that it is very inexpensive compared to upgrading all 2.5Gb and 10Gb base network environments. We only need a managed switch to achieve this (even using smb3.0 without the switch).
Higher transfer speed is still very important for NAS. Especially when multiple people are accessing files in NAS at the same time, the network traffic jam will greatly reduce the user experience. Single port gigabit network can become a limit for speed, so we need link aggregation to solve the problem. Synology’s high-performance models have always had a tradition of configuring dual-gigabit or even four-gigabit networks, the purpose of which is to use for link aggregation. The link aggregation function can provide with faster network access speed at a low cost to meet the speed guarantee when multiple users retrieve files at the same time.
Link Aggregation Setup Steps
The Synology DS720+ we tested has a dual-port configuration, which can be very simple to implement link aggregation with a managed switch. First we need to select the [Network] page in the [Control Panel]. After selecting [Network Interface], we can see that two network interfaces are connected to the network, LAN1 and LAN2, and then we need to set up these two networks. Click the [New] button and select [Create Bond] to enter the link aggregation settings page.
Synology provides a variety of link aggregation modes for us to choose. The [Adaptive Load Balancing] mode is equivalent to auto option, when the switch does not support link aggregation, we can choose that option, and Synology will automatically help us to load balance the dual network ports to improve the read and write speed when multiple users access at the same time. [IEEE 802.3 ad Dynamic] and [Balanced XOR] correspond to the dynamic and static link aggregation modes supported by managed switches respectively, which need to be selected according to the switch type. [Active/Standby] mode is a fault-tolerant backup mode, which does not provide network speed overlay. Generally, managed switches mostly support [IEEE 802.3 ad dynamic] link aggregation mode, so the second one is selected here.
Check the network ports we are going to do link aggregation on, select all 2 ports and continue to the next step. It is recommended to set the IP address manually to prevent the NAS address from changing after reboot. At this point, the link aggregation of Synology part is finished.
Since we choose the link aggregation mode as [IEEE 802.3 ad dynamic], the link aggregation in this mode must be set up correspondingly in the switch before it can take effect. Therefore, we need to enter the management interface of the switch. The setup method is slightly different for different brands of network switches, but the idea is the same. Find the Link Aggregation page of the switch, which is the link aggregation page.
We need to add a group of network ports for link aggregation, here I have 3 and 4 network ports connected to the Synology, so check 3 and 4 network ports, and select the mode of link aggregation as LACP mode, save it and it is OK. (PS: LACP mode is the [IEEE 802.3 ad dynamic] mode we selected above in Synology)
So far all the link aggregation settings are done, and you can see in the network interface that Bond1 has been built, and the network status is 2000Mb/S, the speed has been doubled.
In the actual experience, I used 2 PCs in the LAN to copy the movies in Synology NAS at the same time with smb, each PC can download the movies at the full speed of wired network, the network speed is superimposed to 210-226MB/s, the link aggregation really doubled the network speed!
How To Speed Up Synology NAS – SSD Cache Setting
After solving the network speed limit, if we want to reach 220MB/s, we also need the support of the hard disk. In general, the mechanical hard disk we used has the read and write speed limit of about 110MB/S, which obviously can not reach the speed after the link aggregation, unless we use a dual-disk raid 0 configuration to achieve that. The raid0 mode does not have any security, so almost no one use raid0 mode in the NAS applications. While the raid5 and raid6 modes with security measures can achieve 220MB/s rate support, they require a minimum of 3 and 4 hard drives respectively to set up. Therefore, the use of SSD cache becomes the preferred solution to achieve secure storage and speed up Synology NAS.
Synology DS720+ supports the installation of two NVME SSDs to accelerate file processing, and with the help of SSD cache, it will achieve these:
- accelerate read performance in multi-user use
- improve VMM virtualization performance
- accelerate Snapshot Replication snapshots
- optimize web servers
- accelerate file indexing.
After installing the SSD into DS720+, you can find the installed SSD in Storage Space Management. Next, you can start deploying SSD cache.
First, select [SSD Cache] in [Storage Space Management] and click [Add] to start creating ssd cache. To improve the overall performance, I have selected the read/write cache here. After that, just follow the setup wizard step by step to continue. Check two SSDs, select accelerated storage space, select raid1 type, and select maximum capacity respectively. A few simple steps to build a high level of SSD cache is complete. The SSD cache is still very significant to speed up small files and fragmented files. It can greatly improve the reading and writing speed of small files, such as bulk photo import and export.
ISCSI disk mount
The storage service of Synology NAS is not only used to mount the shared network disk through the smb protocol, but also often uses ISCSI mount as a local computer disk, which can be convenient for PC disk expansion. And through SSD cache deployment, it can directly improve the performance of mounted iscsi disks. For those who don’t know how to mount an iscsi disk, here I will introduce how to mount an iscsi disk to a PC by using Synology NAS.
We need to find [iscsi Manager] in the application, open it and select [Target] page to add a new ISCSI Taget. According to the system prompt, set the name of ISCSI disk in order; select [Add a new ISCSI LUN]; set the name and size of the disk to be mounted; and finally confirm to finish the establishment of ISCSI disk. The ISCSI disk on the Synology NAS is created, and we need to mount this disk onto PC next.
Here we take Win10 mount as an example, first you need to open [Control Panel], find [Administrative Tools], select [ISCSI Initiator], then we can start the ISCSI disk mount.
After entering the ISCSI initiator, select [Discovery Portal] under the [Discovery] page, and enter the IP address of Synology in the new page that pops up, and use the default port 3260 for the port.
Click on the [Target] page, and this time you will see the ISCSI disk we have added in. Click on the link and in the new window click on Confirm to finish mounting the ISCSI disk. However, at this point we still cannot use the disk, we still need to partition, format and mount it in Disk Manager.
Right click on [My Computer] and select [Manage] to open [Disk Management Interface], you can see that our mounted ISCSI disk is not yet initialized and is in an unusable state. Double click on the disk to initialize it.
After that we can create disk partitions like local disks, select capacity, assign disk letter and format them in order to finish mounting the disk. You can see your successfully mounted local disk in My Computer, and there is no difference in the way you use it and the local disk.
The impact of SSD cache on read and write performance
Through the test we can find that the use of SSD cache has qualitatively improved the read and write performance of small files, greatly improving the performance of the original mechanical hard drive.
Firstly, the ISCSI hard drives before and after using SSD cache were tested separately using AS SSDs, and it was obvious that the read and write speeds of 4K and 4K 64 threads increased significantly.
Using CrystalDiskMark to test the ISCSI drives before and after using SSD caching, and it is also clear that for small files reading and writing are exponentially improved, greatly improving the reading and writing performance of small files.
Through the test, the SSD cache test results and the actual using experience are almost the same. Read and write speed improvement is very obvious for the scattered small file. For continuous writing files, due to the limitations of the gigabit network, we did not test the difference in speed.
But if we use it in conjunction with the link aggregation mentioned above, the SSD cache can also provide an excellent performance boost on sequential writes. Under normal circumstances without SSD caching, the read and write speeds are limited to 100MB/S or less due to mechanical hard drive speed limits. After using link aggregation, the apparent read overlay speed has reached 220MB/S, far exceeding the limits of the mechanical hard drive. This is where the SSD cache comes into play.
Conclusion – How To Speed Up Synology NAS
The core spirit of Synology is to present high-end technology to users in a simple way, so that general users can easily get started and feel the efficiency improvement and lifestyle change brought by technology. The user-friendly design is the highlight of Synology NAS, and the easy-to-understand settings make it more convenient for users to use. At the same time, there is no shortage of specialized functions, through different suite applications (virtual machine, Docker, etc.) it can also meet the high-end, professional users.
For example, the link aggregation and SSD caching covered in this article is one of the advanced ways to use. With the application of link aggregation and SSD caching, it can greatly speed up Synology NAS, which may be an economical choice for those with high performance needs. This method can save a lot of cost relative to high-capacity SSD and 10 Gigabit network deployment.
Enjoyed this tutorial? Then be sure to check out our this guide of the Best 10GbE NAS.