In this tutorial, we’re going to look at how to fix NAS network.
Synology NAS users occasionally encounter such a situation: they have not used their NAS for a period of time, but find that their Synology NAS cannot connect to the Internet when they come back. As a dedicated data storage server, Synology NAS must store a large number of important files and data. Some users started to get angry at this time. But don’t worry, it’s just a small problem. In this article, I will guide you in detail how to detect the network environment and teach you to quickly solve the network problems you may encounter.
The Intranet Can Not Access The NAS – How To Fix NAS Network
If your Synology NAS is no longer accessible from your usual intranet IP address, first you can download a Synology Assistant on your computer to scan for it and find your NAS to connect to. If your Synology NAS shows DHCP (automatically obtained IP address) in the IP status, you should change it to a fixed IP. In this way the IP address will not change whether the router or NAS loses power. This will make it easier to use at home or in a small office. You can select the network you want to modify in Control Panel – Network – Network Interface to “Edit”. Also set the network segment of the router in your home, making sure that the NAS is in the same network segment as the router. You can set the last address as large as possible, in order to avoid conflicts with other automatically assigned devices, which may result in inaccessibility.
If you can’t find your NAS in Synology Assistant either, or if the NAS transfer speed is slow, it’s better to try a direct connection test.
1. Testing in a Gigabit environment
First set your computer’s network configuration to DHCP and turn off the Windows network firewall. Then connect your computer directly to the Synology NAS with a Category 5 or higher network cable. At the same time, disconnect the computer from other network connections such as WiFi and use Synology Assistant to search and connect again. At this point you can check if the network status in Network Interface of Synology NAS is gigabit and if the network speed of the computer is 1Gbps. You can also try a file transfer test by file protocol (it is recommended to prepare an ISO or zip file larger than 10G for this test), in order to check if the speed can reach gigabit.
2. Testing in a 10 Gigabit environment
If you have a 10 Gigabit environment, such as the DS1621+, DS1821+, with a 10Gb switch and 10 Gigabit network card, there are three things to remember before you connect to the NAS and start testing.
- The network cable used for testing should be replaced with Category 6 or above cable.
- Set the NIC MTU to 9000 (10 Gigabit requires a higher MTU to achieve normal speeds).
- Adjust the MTU of your computer’s network port to 9000 as well. Turn on Jumbo Packet for your computer’s network card.
Then you can check the network status and test the file transfer. If you are unable to find your Synology NAS during the direct connection test, or the transfer speed is still abnormal after completing the above operations, I recommend you to contact Synology’s after-sales technical support directly to solve the problem. If everything is normal in the direct connection test, but the problem occurs when the NAS is put back into the normal network environment, it is very likely that other network devices such as routers and switches are faulty. And you need to contact the corresponding manufacturer for troubleshooting.
The NAS Can Not Access The External Network – How To Fix NAS Network
If your Synology NAS can not access the external network, such as the package center cannot be displayed normally, the package cannot be downloaded normally, etc. But other devices in the network can be connected to the Internet normally, you can try the following steps to troubleshoot.
1. Troubleshooting browser problems
Logging in to NAS using Firefox or Chrome browser will avoid page load exceptions caused by browser incompatibility.
2. Troubleshooting the system time
In Control Panel – Regional Options – Time, select “Synchronize with NTP server” and select the server address as “pool.ntp.org” and click on “Update Now” . This step helps you synchronize the correct system time. If automatic synchronization is not possible, you can also specify the correct time manually.
3. Troubleshooting DNS
Change the DNS to 223.5.5.5 or 180.76.76.76 in Control Panel – Network.
How To Verify A NAS Network
If you have encountered such a situation: the network environment where your Synology NAS is located needs to be authenticated to access the Internet, but the NAS network is unable to complete this step, so your Synology NAS can only be used on the intranet. It is quite common for some companies and universities to connect to the external network and need to be authenticated. The following tutorial can help you easily complete the NAS network authentication. Due to this method involves Docker, it is only applicable to the Synology Plus series and above models.
Before we start, we need to do some preparation. First of all, we need to prepare a computer, Windows or macOS no matter what, and install or download the following things.
- 1. Install Synology Assistant (To make sure the IP address of the NAS).
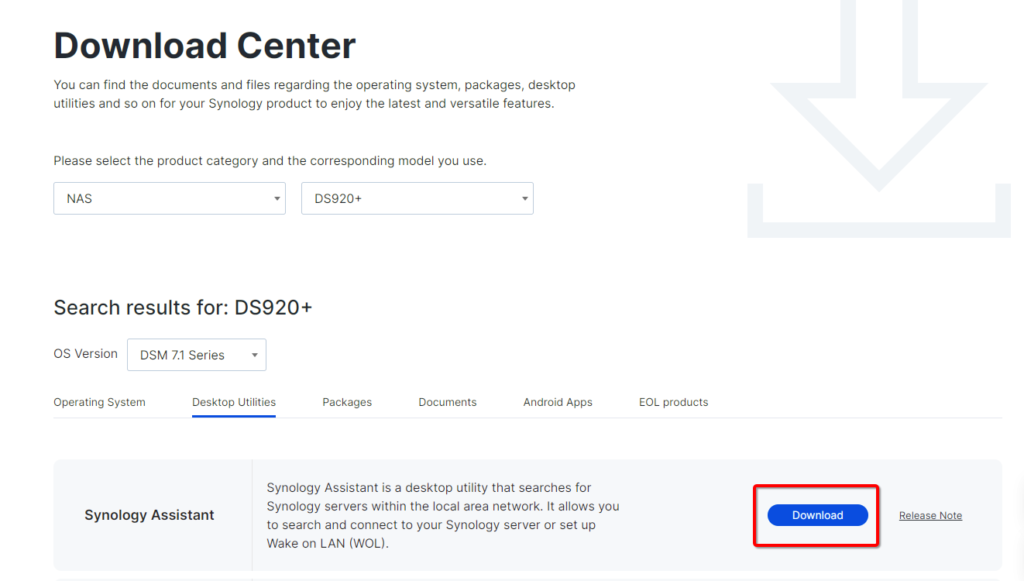
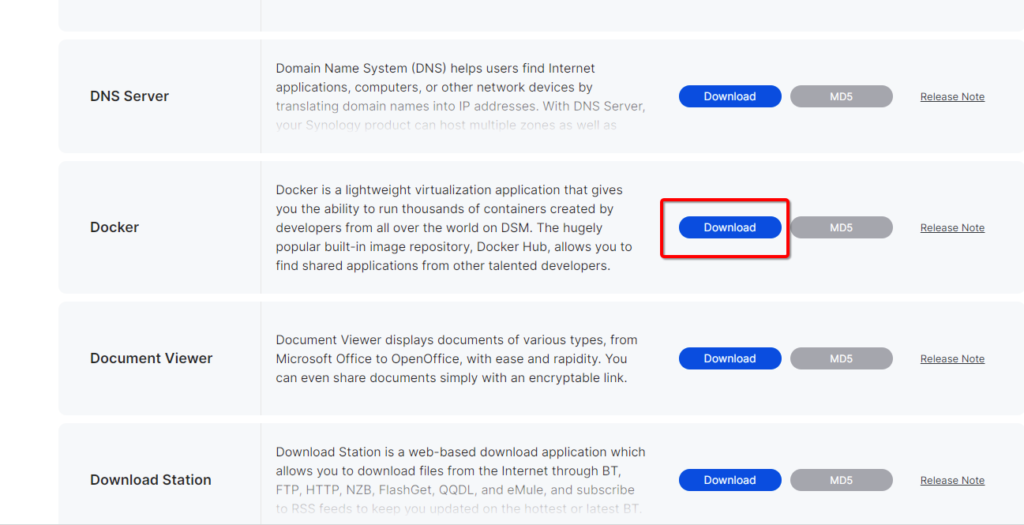
- 2. Download the Docker package installer (Install Docker in the NAS). Both of the above packages can be downloaded from the download center on the Synology website.
- 3. Download the siomiz-chrome container (To authenticate with your computer).
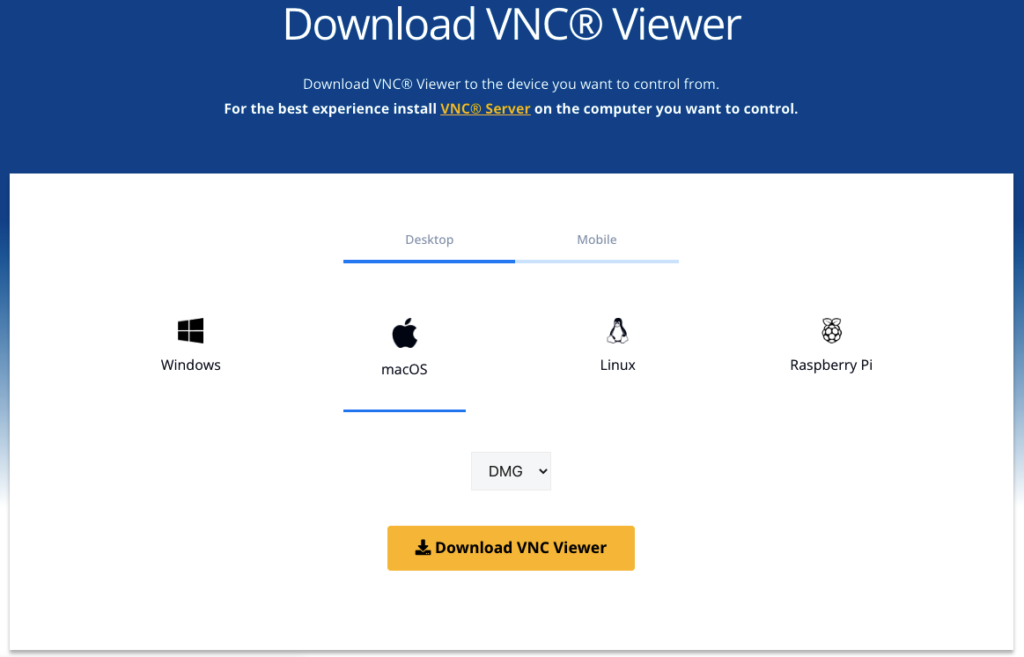
- 4. Download the VNC installation package (To authenticate your computer as a NAS).
In addition, if your Synology NAS is a single-port model, you will also need to prepare a router. For dual-port models, you can connect one to the network you need to verify and the other port to the computer directly with a network cable. For single-port models, please connect the router to the network and then connect your Synology NAS and computer to the router. Next you can start further operations.
Step 1:
Search and connect to the NAS. Use Synology Assistant in your computer to search for the NAS to connect to and record its IP address.
Step 2:
Install the Docker package and container. Click on “Manual Installation” – “Browse” in the “Package Center“, select the installation file .spk prepared before. Follow the instructions to complete the installation. Upload the siomiz-chrome container package to any location in the NAS File Station. Open the installed Docker, click on “Containers” – “Settings” – “Import“. Select the file you just uploaded and click “OK” to install it. Once the installation is complete, start the container and click on “Details” to record the “Local Port“.
Step 3:
Connect the computer to the NAS to complete the authentication. Next, we move to the computer to continue operate. First, open the downloaded VNC installation file, tick the client and install it. Once the installation is complete, open VNC. Enter the IP address of the NAS in the address bar: local port, then enter and the connection will be made. You will be prompted with a warning when connecting, please select “Continue” to proceed. Information will show whether to send your browser crash logs to Google or not. Just click “OK”. Then a new browser window will be opened and you will see that it is using the NAS identity to access the internet. All you need to do next is to complete the authentication process as normal. Once you have completed these three steps your Synology NAS will be ready to access the internet.
Troubleshoot Other Network Issues
You can check the problem according to your own network environment. The more common ones are to check whether the router or firewall has enabled security configuration, such as ARP protection or traffic filtering.
Conclusion – How To Fix NAS Network
The above is the tutorial for detecting and repairing your Synology NAS network. If you still have network access problems after following the tutorial, I suggest you contact Synology’s after-sales engineers to troubleshoot and solve them. I hope this tutorial can help you fix NAS network problem.
Enjoyed this tutorial? Then be sure to check out our this guide of the Best 10GbE NAS.